*I'm using a 1x6 that's 6 ft long.
*14 (minimum) wooden yardsticks
*An adhesive (I used Liquid Nails)
*Felt Dots
*A hacksaw or circular saw
Now I do have about $30 wrapped up in supplies on this project but you could probably cut costs considerably depending on the type of materials you choose. (The board I used is the highest grade poplar. I didn't have a choice on the board. We only have one hardware store here in Podunk and it was the only board that was available to my dimensions.) I used a mix of vintage and new yardsticks, some were free and the most expensive one I purchased, because of the town listed on it, cost $3. On the new yardsticks I had my children draw and color on them with permanent markers to add a little something. .
Instructions:
(This is a super easy project with no real directions needed. But here we go.)
1. Lay the yardsticks out in a random pattern, so that the 1x6 is covered completely. Stagger them for the best effect.

2. Once you get a pattern you like, glue them in place. Again I used Liquid Nails Clear Silicone. I like that it dries clear, sets up a little slowly (so you have time to change your mind), and helps fill in any unevenness in the lumber or yardstick.
3. You might consider placing heavy books (items) on the yardsticks while the glue dries.
 |
| I craft in my kitchen. So my heavy objects tend to be the items I find in said kitchen. |
4. Trim the yardsticks off at the top and bottom, so that you have a clean edge.
 |
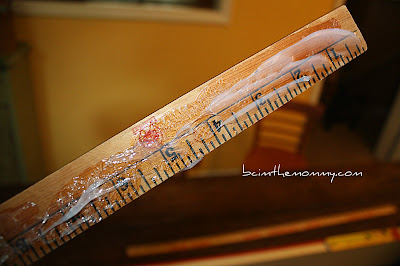
| Sorry no picture of my father using his circular saw to clean up the edges. |
5. I used the leftovers to cover the sides but you could also stain or paint the edges.
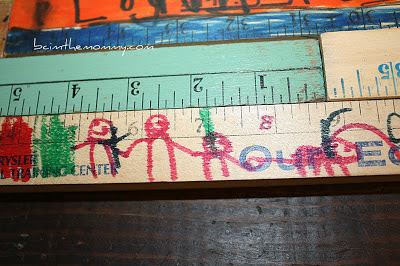 |
| A close up of some of the drawings my children did on the yardsticks. This depicts Mommy, Daddy, Porter and one of our dogs on a walk. Porter pointed out, to his brother and sister, that he didn't draw them in the picture because he didn't want them to go on the walk and that started a HUGE fight. SMH Fighting over an imaginary walk, who knew? |
6. After everything dries transfer your children's growth marks and dates. I used a Sharpie marker and I figure that when I'm done measuring my kids, I'll probably seal the whole thing.
 |
| Don't forget to add their birth length at the bottom! |
So what do you think of my take on the Pottery Barn Growth Chart?
Peace Out!
 Pin It